In this Machine Learning tutorial we will be using Python as a programming language and hence we need to install Python IDEs and Python packages/libraries required for machine learning. Choice of Python in this tutorial as the Programming Language to describe the Machine Learning algorithms is due to its popularity in both the data science and the web development community and more so because of the availability of a large number of its numeric computing libraries.
An IDE or Integrated Development Environment is an application which provides programmers with the basic tools to write and test software. In general, an IDE consists of a source code editor, a compiler/interpreter or both, build automation tools and a debugger. Moreover, the IDEs can have the functionality of Plugins which are software add-ons created to enhance the capabilities of the IDEs.
Python has many open-source IDE options to learn Machine Learning. Some of them are:
– Spyder
– PyCharm
– Jupyter Notebook
– Canopy
– Geany
– Rodeo
– Atom
We will be using the popular Anaconda distribution for this tutorial and Spyder as the IDE which is available inside it, that is, you don’t need to install Spyder IDE separately.
ANACONDA
Anaconda is a free and open-source distribution of Python and R programming languages for scientific computing in data analysis, machine learning, large-scale data processing, predictive analytics etc. The main advantage of the Anaconda distribution is that it simplifies package management and deployment by managing libraries, dependencies and environments. It acts as a Package Management service that makes it easy to find, access, store and share files and environments. The package versions are managed by the package management system “Conda”.
We will now install Anaconda distribution and use the Spyder IDE which is present inside it.
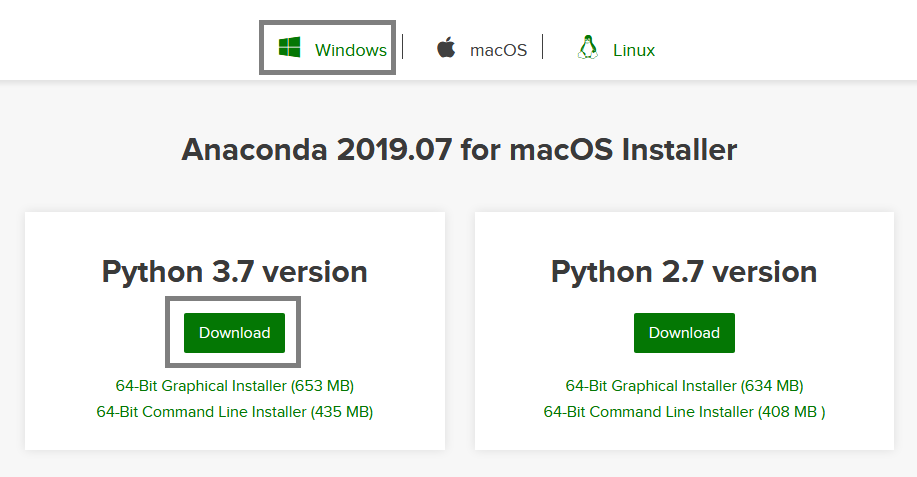
Navigate to the official Anaconda distribution site by clicking on this link.
Select your OS version (Windows, macOS or Linux) and click on the “Download” button against the Python 3.7 version (we will be using Python3 and not Python2). Depending on the release time, you might see later versions of Python here.
Save the executable file (Anaconda3-2019.07-Windows-x86_64.exe) in your local file system and double click on the executable file to start the installation process.
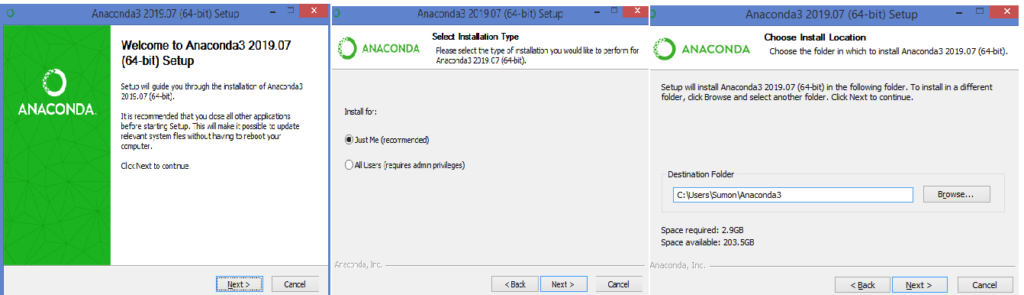
Don’t check any of the checkboxes in the next prompt and click on the “Install” button. This will start Anaconda installation into your machine. This will take some time depending on your internet speed and once completed, click on the “Next” button and finally the “Finish” button.
To confirm that Anaconda is installed correctly in your system open Anaconda Navigator by clicking on Start -> Anaconda Navigator (Anaconda3). If it opens up successfully, it means that Anaconda is installed correctly in your system.
To view the installed packages and their versions in Anaconda, open Anaconda Prompt by clicking on Start -> Anaconda Prompt (Anaconda3) and then enter the command conda list. To run the Python shell use the command python and to exit from the Python shell, use the command quit(). You can also check the conda version and the python version by entering the commands conda –version and python –version respectively.
Now to start using the Spyder IDE, click on Start -> Spyder (Anaconda3). Click on Spyder (Anaconda3) and the Spyder IDE will get opened in your system.