I will be honest. The first time I came across Git, I found it to be quite complicated and difficult to understand. After going through some of the tutorial videos and blogs on how to work with Git, though I was able to perform my tasks, still I found it to be nothing less than magic. You just write some commands in the terminal and repositories are getting created, files are getting moved locally or through the network, changes are getting reverted and what not.
I decided to take some time and delve into it and try to understand what is actually happening inside. This blog is a step-by-step documentation of what I learned and which you can also try in your system. You will surely like it.
To us, Git is a “Version Control System”, but from internal architecture point of view, it is actually a “Content Addressable System (CAS)” where the “Content” is the data to be stored. “Addressable” means that the data can be accessed using a key (address). Git generates and holds unique IDs for the contents.
Note:- We will use “Git Bash Terminal” here (Install Git if you haven’t done already) and work with bash commands.
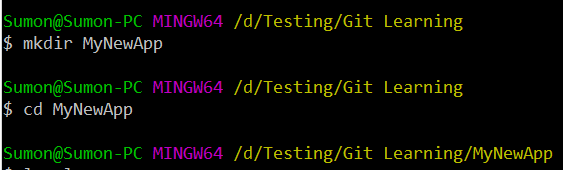
Let’s start by quickly creating a new folder “MyNewApp” for the project and move inside the folder.
Now, initialize a git repository inside the folder by running the command “git init”. Also, run the command “du -c” to view all the directories and subdirectories inside the current “MyNewApp” directory.
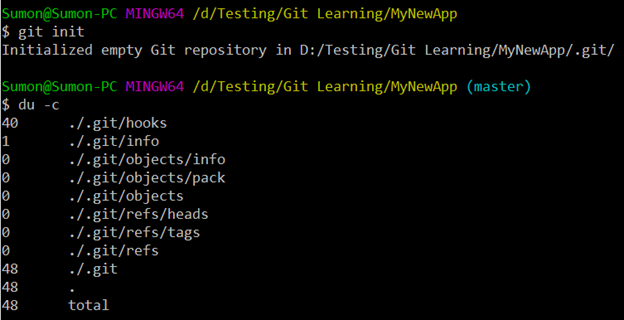
You can see that many subdirectories got created inside the “.git” directory. You can think of this as a database containing all the information required to retain, manage and retrieve the revisions/history of a project. It uses the data structures “index” and “object store” to achieve this.
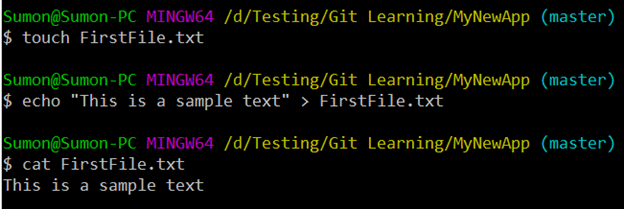
Now, we will create a text file “FirstFile.txt” inside the project folder by using the command “touch FirstFile.txt” and write some content inside it. The command “cat FirstFile.txt” will print the file content.
Now, let’s add and commit the file created using the “git add” and “git commit” commands.

Here, it is important to note that:
Git treats files as “objects” and the addresses to the files are also treated as objects (but with “SHA”).
Now, what is SHA?
The files, in Git, are represented by 40-character strings “object names” which are calculated by taking the SHA1 (a cryptographic hash function) hash of the contents of the objects.
After the commit, running “du -c” command in the terminal, we can see that three objects got created inside “./.git/objects/”.
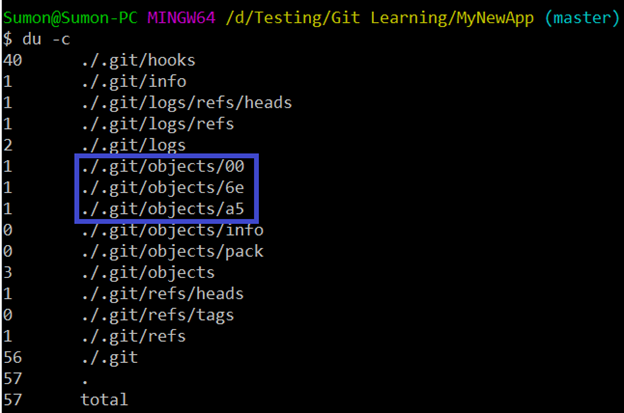
We can view the hash for the content that has been added and committed using the command “ls ./.git/objects/a5”.

To verify the content of the file using the hash, let’s run the command “cat .git/objects/a5/3073ff9f6d50c5ead79b0232869618889fec70”
This outputs a garbage value. Reason being – git compresses the file content in “gzip” format using the “zlib” library.
We can decompress the compressed file by running the below command:
“printf “\x1f\x8b\x08\x00\x00\x00\x00\x00” |cat – .git/objects/a5/3073ff9f6d50c5ead79b0232869618889fec70 |gzip –dc”

The output, as you can see, consists of 3 parts -> “blob” (which is the file type), the “size” of the file content (in terms of number of characters) and the actual file content. “blob” stands for “Binary Large Object” which is generally a file and is used to store the file data.
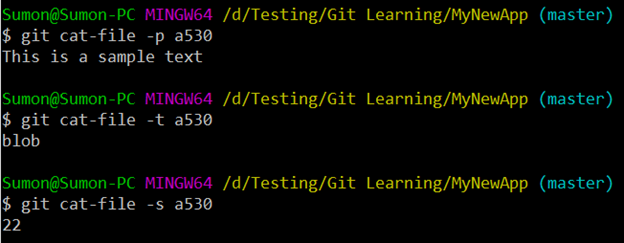
Let’s now introduce the “Git Plumbing Commands”. Whatever git command we generally use, like “git add”, “git commit”, “git log” etc. are called “Git Porcelain Commands”. The Porcelain commands are the human-friendly, high-level commands, while the Plumbing commands are used to directly manipulate the Git internals. One such Plumbing command is “git cat-file” which can be used to view the content, type and size of the file by using its hash. Let’s see the content of the file we created by using the combination of “git cat-file” and the hash. (“-p” will give you pretty print, “-t” will give you the file type and “-s” will provide the content size in terms of number of characters present)
To view the “SHA hash” of the file, we run the below command:
“echo -e “blob 22\0This is a sample text” |shasum”

When we did “git commit”, the object “./.git/objects/6e” got created, which actually points to a “Tree” inside Git. Let’s run the below commands to view the details of the commit made.
“ls ./.git/objects/6e” (To get the SHA)
“git cat-file -p 6e8d” (To get the commit details. Here “6e8d” is the combination of the object name and the SHA value)
“git cat-file -t 6e8d” (To view the type of the object, which is “commit”)

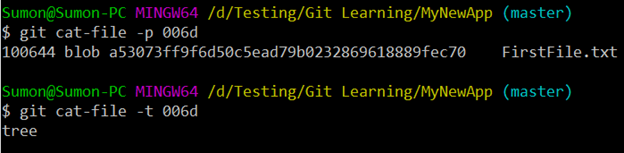
Here we can see that the tree, the commit is pointing to, is given by the hash “006df9db2a4ba8462a03f2f4b6d6ac7020d9b6fb”. So, we can pretty print the tree and the object type using the below two commands:
“git cat-file -p 006d”
“git cat-file -t 006d”
File Renaming
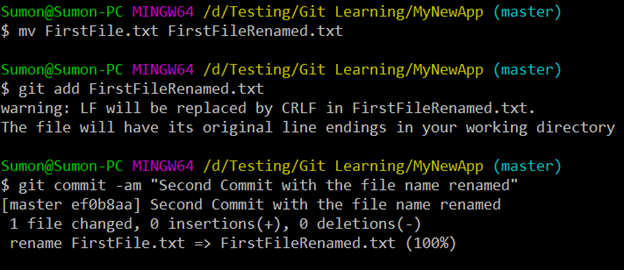
Let’s see how renaming a file works in Git internally. We will rename the file from “FirstFile.txt” to “FirstFileRenamed.txt” and add+commit the renamed file.
“mv FirstFile.txt FirstFileRenamed.txt”
“git add FirstFileRenamed.txt”
“git commit -am “Second Commit with the file name renamed“”
You can see below that two more new objects got created due to this:
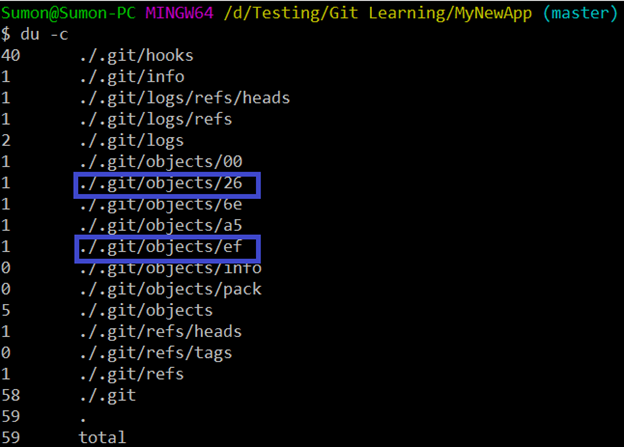
Below we can see that “26” is for the tree and “ef” is for the commit made after the file is renamed.
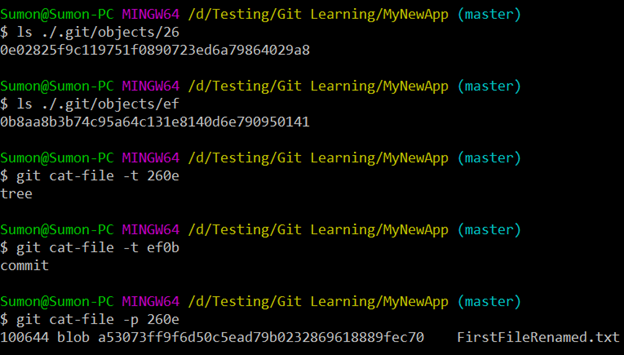
If we take the tree, we can see that the hash value hasn’t changed after renaming the file. This means that Git does not create a separate hash value for the file if the file content, the file type and content-size have not really changed. Hence, the renaming operation gets performed quickly in Git.
Content Modification
What does Git do when we modify the file content? Let’s add a semicolon at the end of the content of the file “FirstFileRenamed.txt” and add+commit the modified file.
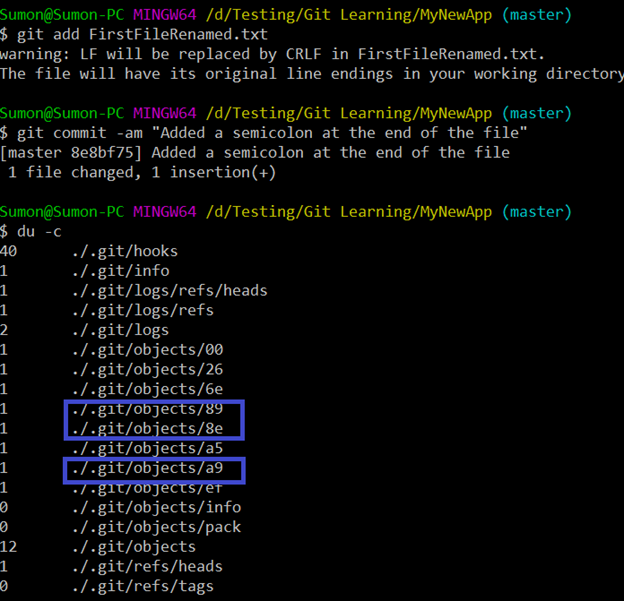
A total of 3 new objects got created (89, 8e and a9). Out of which a new commit object got created on top of the existing commit object. The hash value inside also changed since the content of the file changed.
Now, we can do garbage collection by using the following Git Plumbing command:
“git gc – -aggressive”
This command is actually run by Git when you do “git push” or “git pull” operations and network comes into the picture. What the command actually does is that it compresses the individual blob, tree and commit objects (performs delta compression) and puts them inside “./.git/objects/pack”
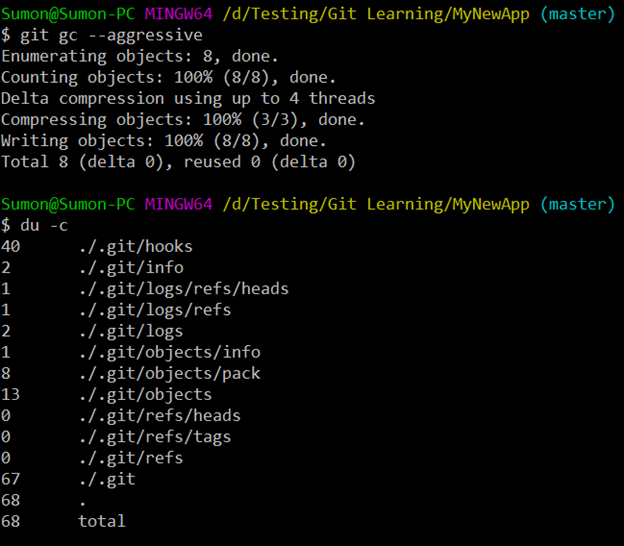
Inside the “./.git/objects/pack”, two files get created – 1) Index file (with .idx extension) and 2) Pack file (with .pack extension). The pack file contains all the information related to the compressed tree, blob and commit objects.
We can use the below command to view those information inside the pack file:
“git verify-pack -v ./.git/objects/pack/pack-3df7d7e8a2fedfc57485ac1abe4b8327beda56a7.pack”
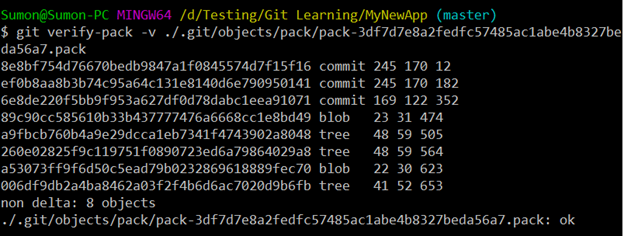
Inside the pack file, there is a “Graph” which tells that there is a file that maybe pointing to a parent file. Using the graph, the pack file helps to reduce the storage requirement and to take less bandwidth wile communicating over the network.
Branching
To git, branches are nothing but “references” pointing to objects. To understand how branching works internally in git, let’s create a new branch from the “master” branch we were working on and switch to it.
“git checkout -b new_feature”
We can view all the available branches by running the command:
“ls ./.git/logs/refs/heads”
Then, we perform “cat” operation on the newly create branch and check the type of the object created.
“cat ./.git/logs/refs/heads/new_feature”
“git cat-file -p 8e8b”
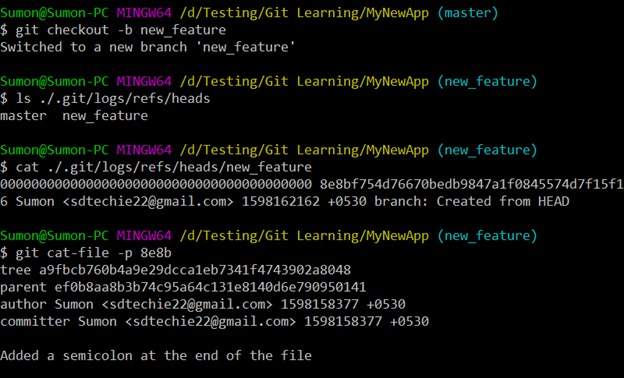
Here, we can see the branch has created a “commit” object and it is pointing/referring to the commit object of the parent.
That’s all for now. Hope you liked this, tried in your local and found this blog to be insightful. Don’t forget to share with your friends and colleagues. Cheers!!